Google Tag Manager
We now offer a pre-configured Google Tag Manager template that automatically sets up Google Analytics 4 and Meta Pixel tracking for you. Check out our Analytics Quickstart guide to get started in minutes.
Google Tag Manager
Google Tag Manager (GTM) is a free tool offered by Google. It can be used to add and update website tags (for conversion tracking, site analytics, remarketing, and more, not limited to the Google suite) in one place without having to change the actual code on your website. This makes it much easier to gather meaningful data about users visiting your website: we highly recommend that you use Google Tag Manager for this purpose.
Google Tag Manager is a widely used tool in the marketing industry and there are a number of first and third-party resources explaining what you can achieve with GTM. The tool allows marketers to configure tracking without needing access to website code, and without needing a web developer after the initial set up.
This article provides a guide on how you can integrate GTM with your website and Spektrix to gather analytics data on the entire patron journey from first visit to checkout. Though the guidance below does not assume knowledge of GTM, you may want to consult these resources and work with an analytics expert for a full picture of how your organization can use and make the most of GTM.
Browse the Partner Directory to find Analytics experts
How Google Tag Manager Works
Google Tag Manager helps you manage the many tags, or snippets of code, that are related to your marketing campaign events. Google Tag Manager gives you the ability to add tracking tags to your site to measure the audience, or to personalize, retarget, or conduct search engine marketing initiatives.
Google Tag Manager can directly transfer data and events to Google Analytics, Enhanced Ecommerce and/or many other third-party analytics solutions in order to produce a clear picture of how well your site, products, and promotions are performing.
Before Google Tag Manager, each bit of tracking on a website required adding new code into the website itself. With GTM, one piece of code, the container, automatically holds all your tags. By adding this container code to each page where you want tags (including your Spektrix iFrames) you’ll be able to add and configure tags for your whole site in just one place: the GTM interface.
The general workflow for configuring these Tags will generally speaking require you to set up:
- a Trigger to denote when a piece of data should be passed
- the Tag and type of data (pageview, order conversion, etc.)
- Variables (optional, depending on what type of data you need passed)
If this is brand new for you, you might want to reference Google’s glossary to better understand the terms used throughout this document.
Add a Google Tag Manager Container to Spektrix iframes
Step 1: Create a Google Tag Manager Account
In order to set up any Tags, you will need a Google Tag Manager account.
To get started, you can follow Google’s installation guide to create the accounts you’ll need. If you already have a Google Tag Manager account, you can simply skip to step 2.
Step 2: Add Container Code to Spektrix
Follow this process until you get your GTM container code, which will look like this:
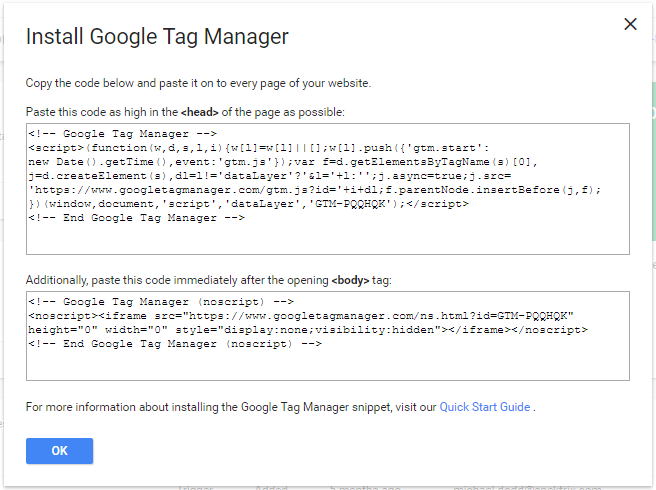
If you need to find this again, once you’ve created an account you can find this code snippet by clicking on the Container ID within the Workspace section of the GTM website.
This code snippet should be copied onto each page of your website that you want to insert tags into, copying the first part of code into the header of the page and the second part after the opening <body> code as instructed.
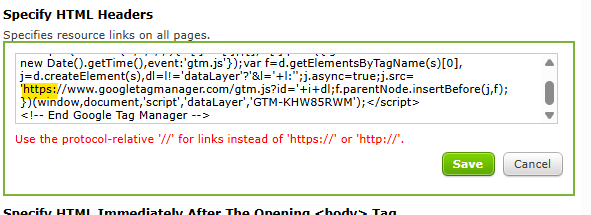
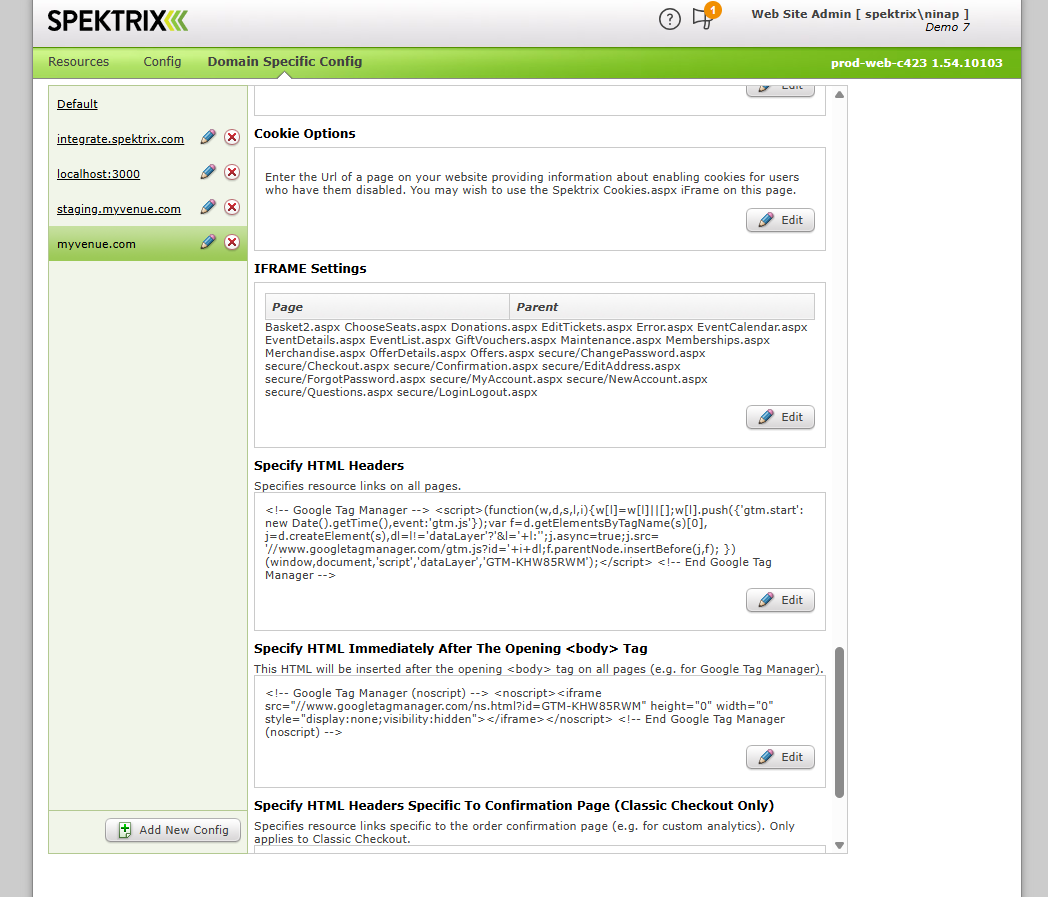
You’ll also want to add this code to your Spektrix iframes. To do this, log into your Spektrix system and go to Website Admin > Domain Specific Config. Paste the first part of the GTM code into the section called Specify HTML Headers and the second part into the Specify HTML Immediately After The Opening Tag section. These are the only places you need to add the code in Spektrix.
You will notice that when you paste in the GTM code and click Save, you will receive the error Use the protocol-relative '//' for links instead of 'https://' or 'http://'. Simply remove https: from the code you pasted in, and then click save.
Repeat this step for any named domain you wish to add the GTM container on. It is recommended you also add it on the Default domain.
Testing tags and triggers on Google Tag Manager
To test that your triggers and tags are working correctly, we recommend using the Tag Assistant Chrome extension rather than relying only on GTM’s built-in Preview mode. Tag Assistant works better with the Spektrix iframes.
In addition to your Google Tag Manager ID, you may also notice IDs for:
- a Google Universal Analytics Tag with ID UA-9818873-4
- a Google Tag Manager container with ID GTM-KL9GK3V
- a Google Analytics 4 property with ID G-F7V05TJ56H
These are placed by Spektrix and are only used to support various business and software functions including informing about queue management, activity levels that clients are experiencing, and managing large onsales events. They should not have any impact upon any Analytics tracking you are planning on doing. The GTM container is configured in a way that consent is required for the tag to fire. You can use your consent management platform to configure and manage consent.
Website Admin
It is possible to add code directly to the iframes in Website Admin. However, this isn't best practice and instead you'll find it's worth the effort of setting up GTM to allow you to easily manage things going forward.
Additionally, the Website Admin fields for the confirmation page can only add code to the confirmation page of Classic Checkout. They are not compatible with Express Checkout so they would not be able to track any conversions completed via the Express Checkout.
Google Support Articles
For more information around Google Tag Manager, Google have produced a number of useful support articles: