Express Checkout Flow
In the following article, links will be referenced as originating from system.spektrix.com. If you have implemented a custom domain for your Integration, please replace system.spektrix.com with your chosen subdomain.
There are two different options for an online checkout experience in Spektrix - in Website Admin you are able to choose between the classic checkout and the Express Checkout. For most new integrations we recommend using the Express Checkout flow, since it is easier to integrate and offers a better booking path for end-customers. In this article we’re taking a look at what the Express Checkout is, what the benefits are of using it, and how to implement it on your website.
What is it?
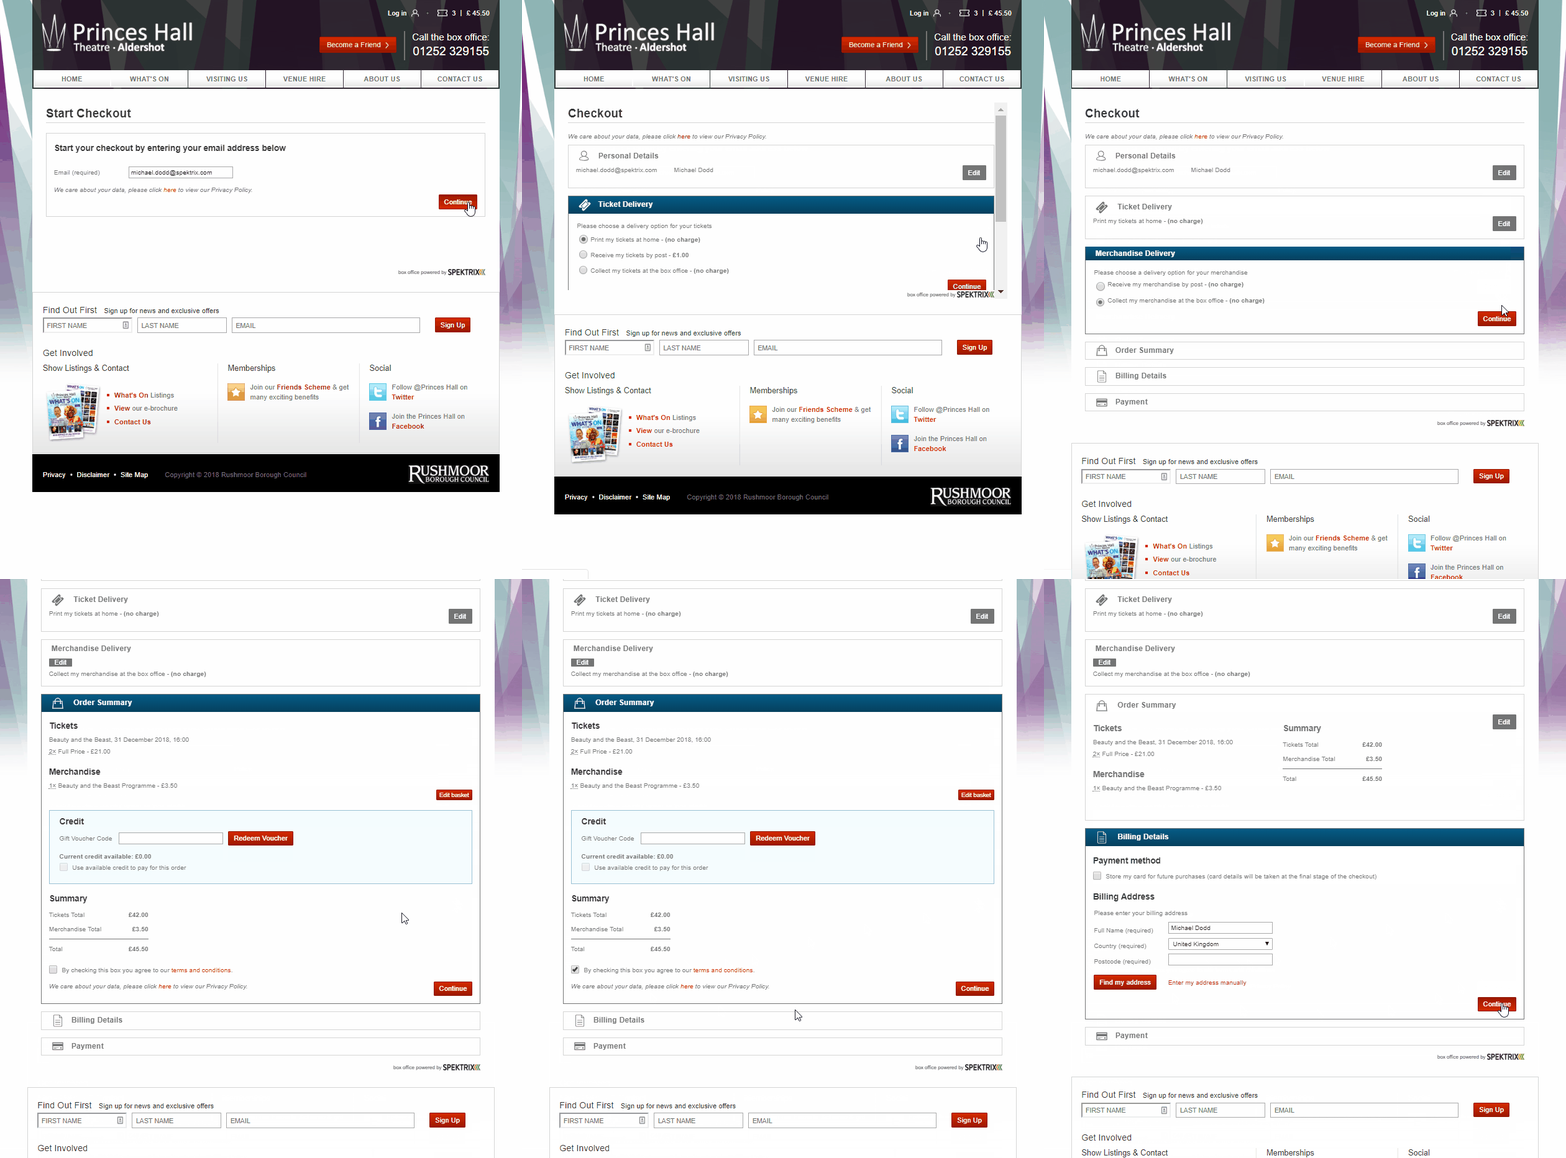
The Express Checkout is designed with mobile users in mind to be quicker and simpler to navigate and easier to style. If you choose to use it, it is switched on in Website Admin and it replaces the classic checkout flow for all Events and other saleable items on your website (although, if you have multiple website domains, you can use different checkout flows for each).
Where the classic checkout flow takes customers through a range of different pages, one for each step of the process, the Express Checkout is designed to appear to display all of those steps on a single page. It is, in fact, multiple pages, so it retains the benefits of multiple Iframe URLs for analytics purposes, while offering a simplified browsing experience for users. It also offers customers the opportunity to make orders without setting a password.
It’s been designed from the ground up with mobile users in mind, to take advantage of the ever-growing proportion of online bookers using mobile devices to purchase tickets and other items. The goal of the Express Checkout flow is to help you to make the most of every sales opportunity via your website, and reduce the time it takes for customers to check out.
What does it look like?
One of the great things about the Express Checkout is its ability to adapt to exactly what each customer is booking and only require them to complete the appropriate steps, so it will appear slightly differently depending on what each customer is purchasing, and what you have set up in your system.
Here’s an example of how it might look, from the Princes Hall website:
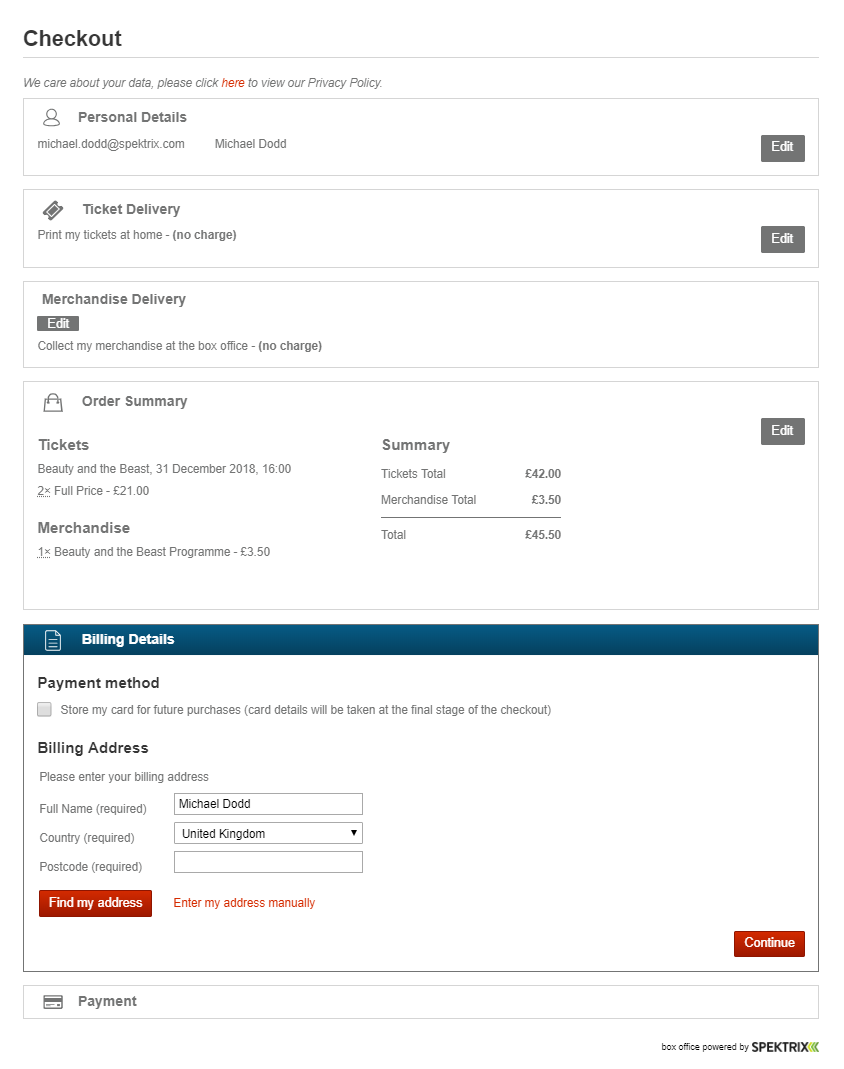
NOTE: the Express Checkout begins at the point when a customer clicks the Checkout button from within the basket.
You’ll notice that this example is only displaying some of the possible sections. There are no donations in the order, and the customer doesn’t have any Contact Preferences set to Not Asked or any Attributes, so those sections have not been displayed.
What are the benefits?
Speed
The overall checkout flow is quicker using the Express Checkout, with various speed benefits including:
- The option for customers to make orders without setting passwords (the system still stores all of the information necessary to complete transactions and avoids creating duplicate customers).
- The ability for returning customers to request a login link be sent to their email address, instead of having to remember (or even set) their password.
- A flexible approach to optional elements of the process, for example:
- If there’s only one delivery method available for an Event or Merchandise, customers won’t be asked to choose a delivery method and will only see the delivery details in the order summary.
- If a customer pays their order completely with gift vouchers, they won’t be prompted for billing details to complete the order.
- Pre-populated fields based on existing information. For example. if a customer already has a billing address against their record, this will automatically be populated by the system.
Navigation
We’ve designed this checkout flow to be easier to navigate for all users - but particularly mobile users. The benefits of this single-page approach include:
Customers can see everything they’ve input throughout the process; once each section has been completed it remains on the screen.
It’s designed to be viewed on a mobile screen, so it’s easy to scroll through.
Styling
It’s easier than ever before to style the Express Checkout, which means it’s quicker and simpler to get set up. Benefits include:
- You can style each element on the first section of the checkout flow, and that styling will cascade down to the rest of the flow, ensuring consistency throughout.
- It’s more customisable than the classic checkout, which means that if you do want to put the time and resources into this, you have a lot of flexibility.
Passwords and accounts
When a new customer makes their first order using the Express Checkout, they’re given the option at the end of the process to set a password, allowing them to access their account online in future. It’s worth noting that even if a customer chooses not to do this, the system still generates a customer record as normal using the details collected in the order, which you can search for in exactly the same way as you would any other customer.
If a customer in this situation chooses not to set a password, they can still return to book on your website using the same email address in future. To do this, they just need to use the ‘Send me a Link to Login’ button in the first Start Checkout section.
This is not a ‘reset password’ link, but rather a login link. It generates an email containing a link that will allow the customer to complete their booking without entering information they’ve provided in past purchases. This link remains active for ten minutes.
Integrating the Express Checkout
Step one - Style the Express Checkout
It is possible to access the Express Checkout before turning it on, via the following URL:
https://system.spektrix.com/clientname/website/secure/checkout/v2
This will allow you to check your current stylesheet against the checkout and make the necessary amends to make it beautiful.
The above URL is for testing only and when active, the express flow replaces the contents of checkout.aspx. The warning message you see at the top of the checkout will switch off once you've completed step two, but in the meantime this message has the same classification as the error messages in the checkout, allowing you to style these ahead of time.
Step two - Turn it on in Spektrix
You can switch on the Express Checkout in the Website Admin Interface. Head to Website Admin > Domain Specific Config and look for the setting called Use Express Checkout Flow. If this setting is missing, it might have been temporarily disabled on the system you are working on. Let the Support team know and they will be able to help.
Once activated, this will replace the existing checkout.aspx iframe with the new flow.
If you have more than one website, with more than one domain set up in Domain Specific Config (for example if your organisation runs multiple distinct venues), you can choose a different setting for each domain.
Step three - Donation Recognition
If the venue is using Donation Recognition, you can also enable this feature in the Express Checkout.
This can be enabled by your contact at the venue by a switch that can be found at Settings Interface > Configuration > System Setup > Donations
This is the only feature which specifically needs enabling to work with the Express Checkout. Everything else will automatically be available.
Iframe List
Express Checkout (Flow, Multiple Pages)
URL:
https://system.spektrix.com/clientname/website/secure/checkout/v2
The Express Checkout is a flow compiled several pages which are strung together to build a smooth checkout flow. It is not activated by default but can be switched on in the Website Admin Interface of Spektrix.
The flow of the Express Checkout is as follows:
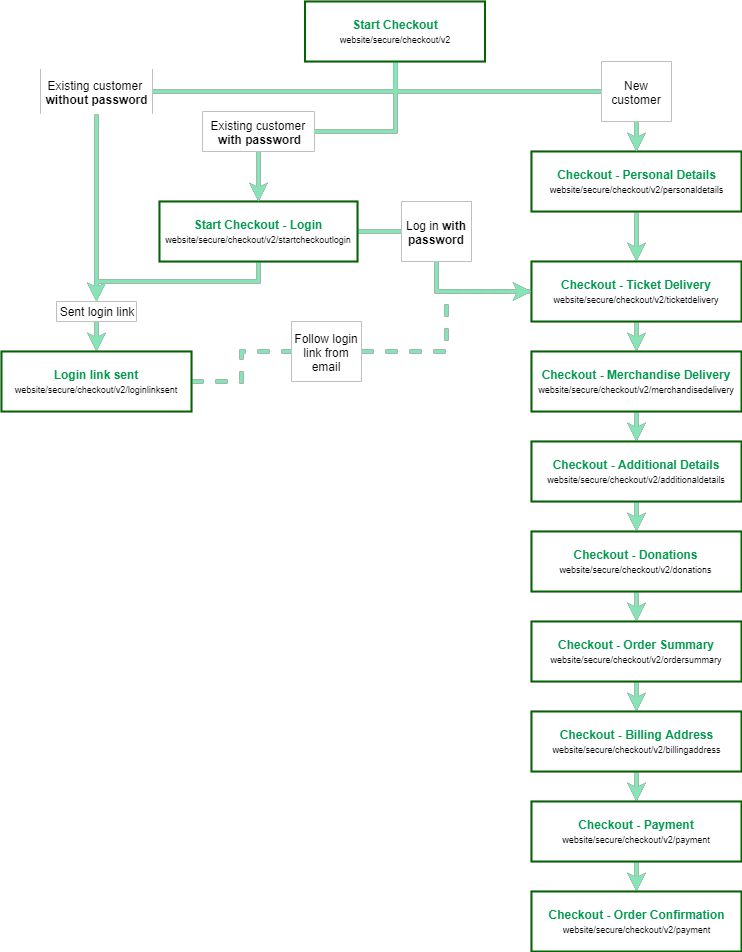
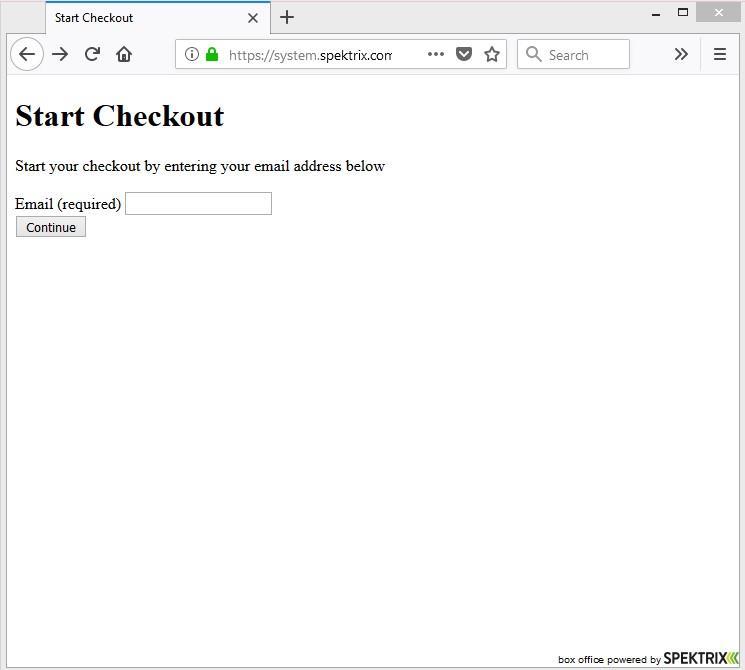
Start Checkout
secure/checkout/v2/
This page of the flow is served when a user clicks “Checkout” in the Basket/Cart Iframe of the booking journey.
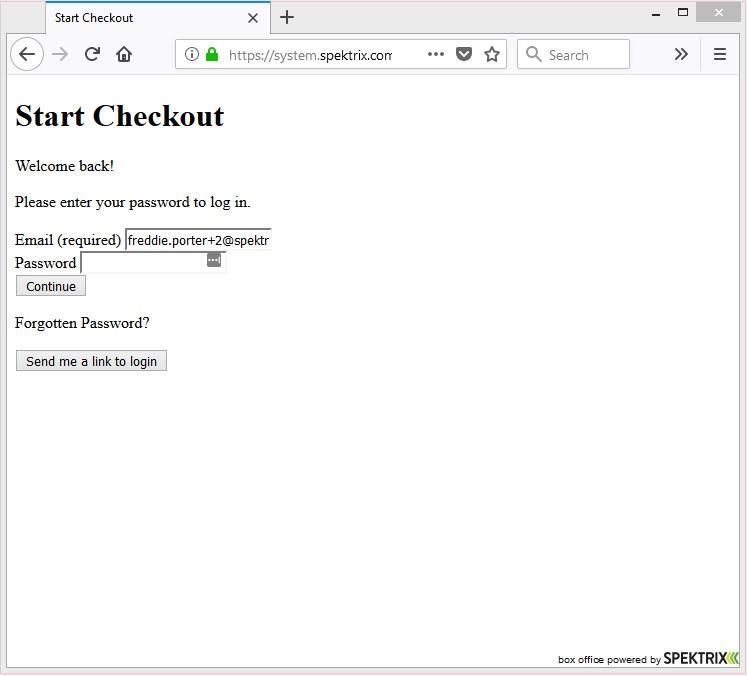
The user must input their email address to the system. If the email is linked to an existing customer account in the client’s system, the user is asked to login with their password. If they do not know their password the user can either reset it, or be sent an email link to login.
To move to the next page, the user must click “Continue”
Login
secure/checkout/v2/startcheckoutlogin
This page of the flow is served when a user inputs an email address that is already associated with a customer record. The user is asked to login with their password. If they do not know their password, the user can be sent an email link to login.
To move to the next page, the user must click “Continue” or login via an e-mailed link.
New Customer, Personal Details
secure/checkout/v2/personaldetails
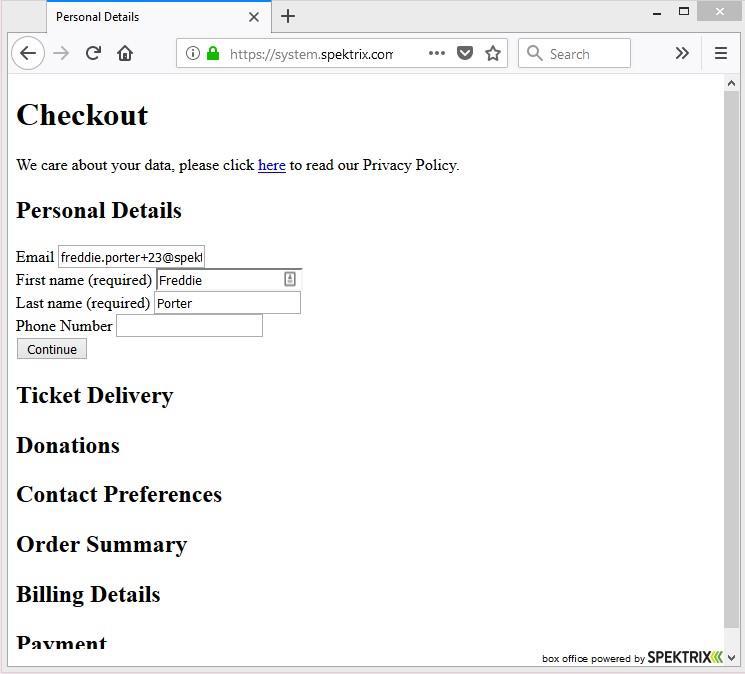
This page of the flow is served if the email address input is not linked to an account within the client’s system. Here users are asked to input:
- Email (auto-filled from previous page, required)
- First Name (required)
- Last Name (required)
- Phone Number (can be a required field)
Existing customers automatically skip this section, but can go back and edit it if needs be.
To move to the next page the user must click “Continue”.
Ticket Delivery
secure/checkout/v2/ticketdelivery
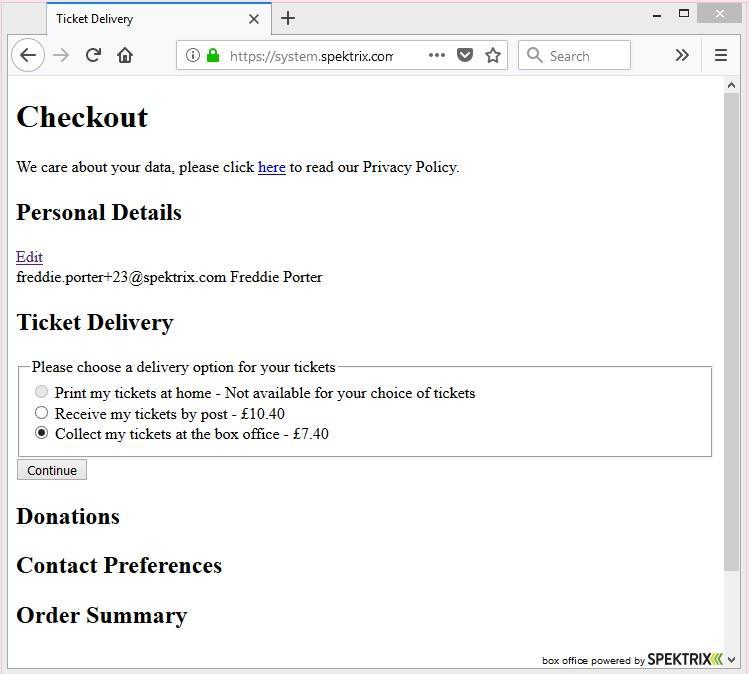
If any tickets are in the basket, this page of the flow shows available ticket delivery options which can include:
- Print my Tickets at Home
- Receive my Tickets by Post
- Collect my Tickets at the Box Office
If only one option is available then this step will not be shown and the user will be shown ticket delivery in their order summary.
To move to the next page the user must select an option and click “Continue”.
Ticket Delivery Address
secure/checkout/v2/ticketdelivery
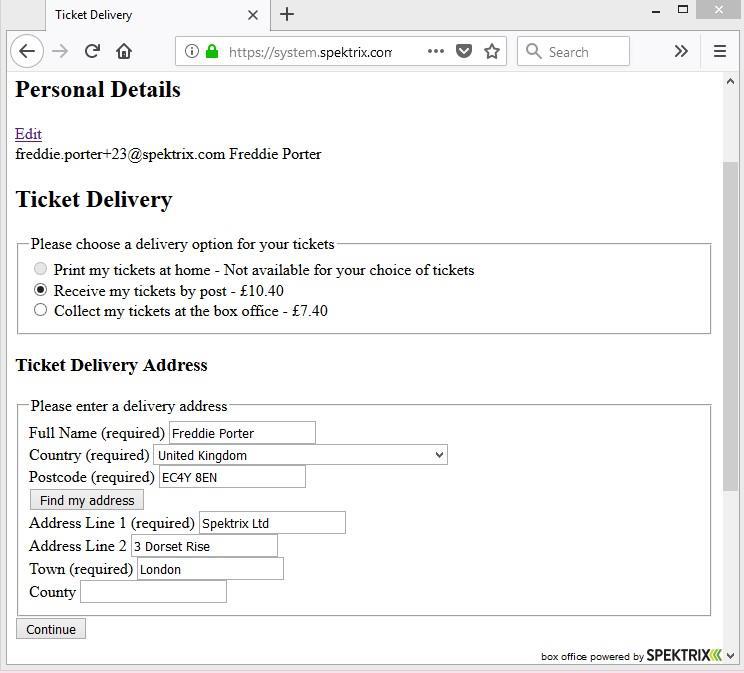
This element of the flow will only show if the customer selects “Receive my Tickets by Post”.
Users must enter the required address fields. If 'Postcode Lookup' is available the user must select their Country, and then enter a Postcode. Once a user has entered their Postcode, they can select “Find my address” and select their address from a matching list of addresses. If the user’s address is not in the lookup list, then they can choose to enter their address manually.
To move to the next page, the customer must select an address and click “Continue”.
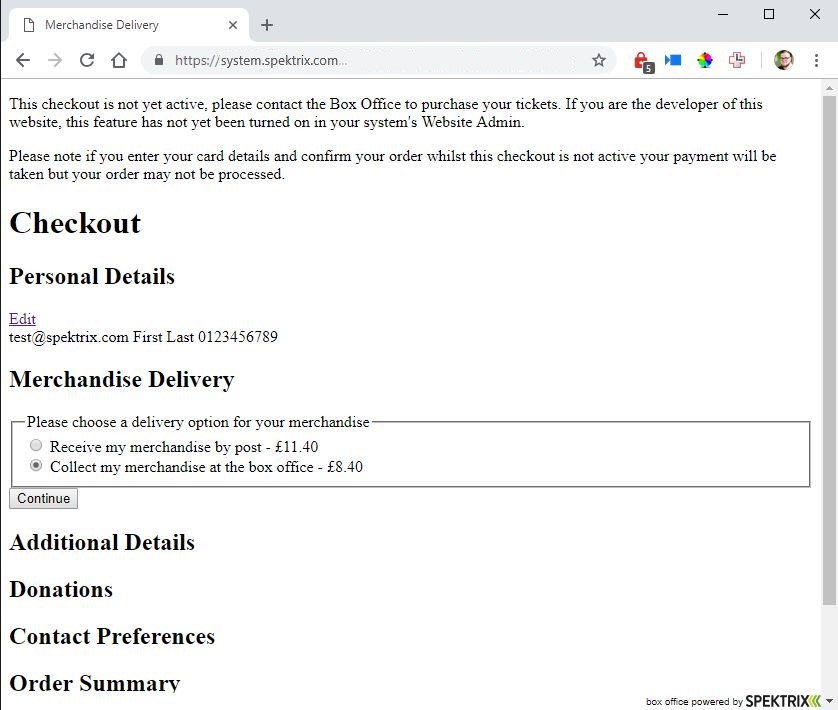
Merchandise Delivery
secure/checkout/v2/merchandisedelivery
If any merchandise items are in the basket, this page of the flow shows merchandise delivery options which can include:
- Receive my merchandise by Post
- Collect my merchandise at the Box Office If only one option is available then this step will not be shown and the user will be shown merchandise delivery in their order summary.
To move to the next page the user must select an option and click “Continue”.
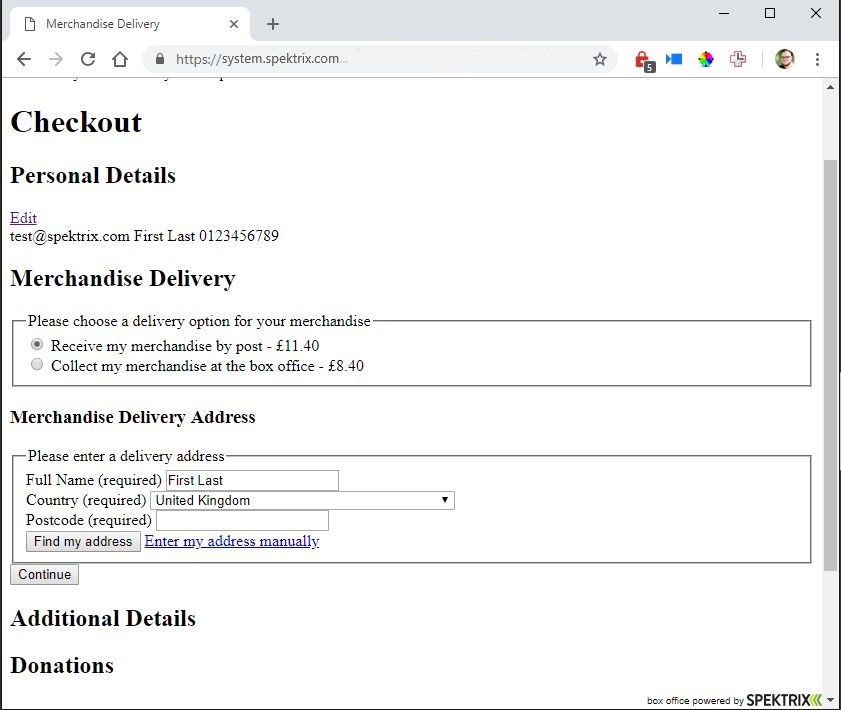
Merchandise Delivery Address
secure/checkout/v2/merchandisedelivery
This element of the flow will only show if the customer selects “Receive my merchandise by Post”.
Users must enter the required address fields. If 'Postcode Lookup' is available the user must select their Country, and then enter a Postcode. Once a user has entered their Postcode, they can select “Find my address” and select their address from a matching list of addresses. If the user’s address is not in the lookup list, then they can choose to enter their address manually.
To move to the next page, the customer must select an address and click “Continue”.
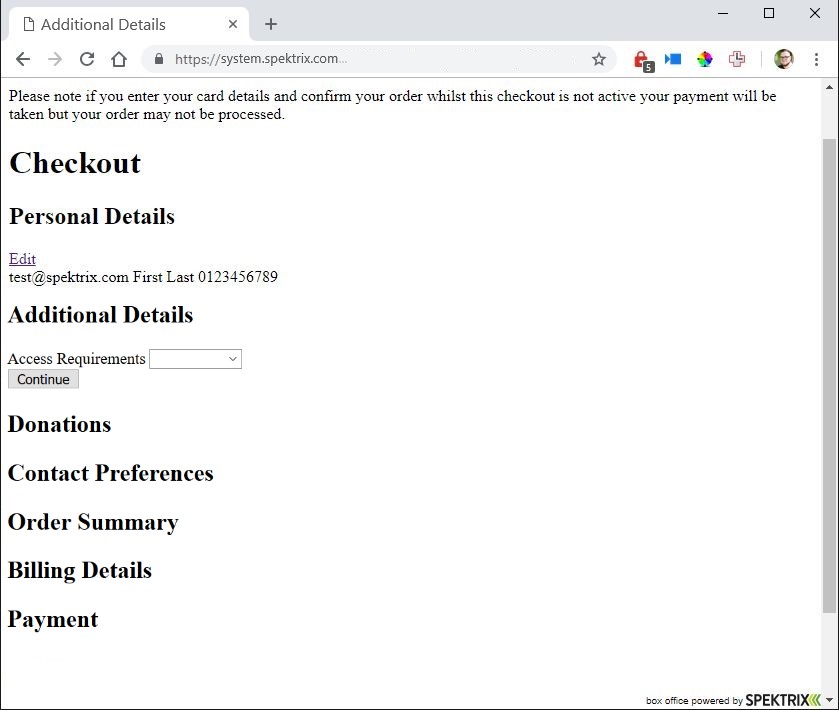
Additional Details
secure/checkout/v2/additionaldetails
This section of the flow will only show if the client has set any Order Attributes to be visible online.
This section will display any Order Attributes that are available to be filled in for this order. The client can select whether or not an attribute is required.
To move to the next page, the customer must fill in the required details and click “Continue”.
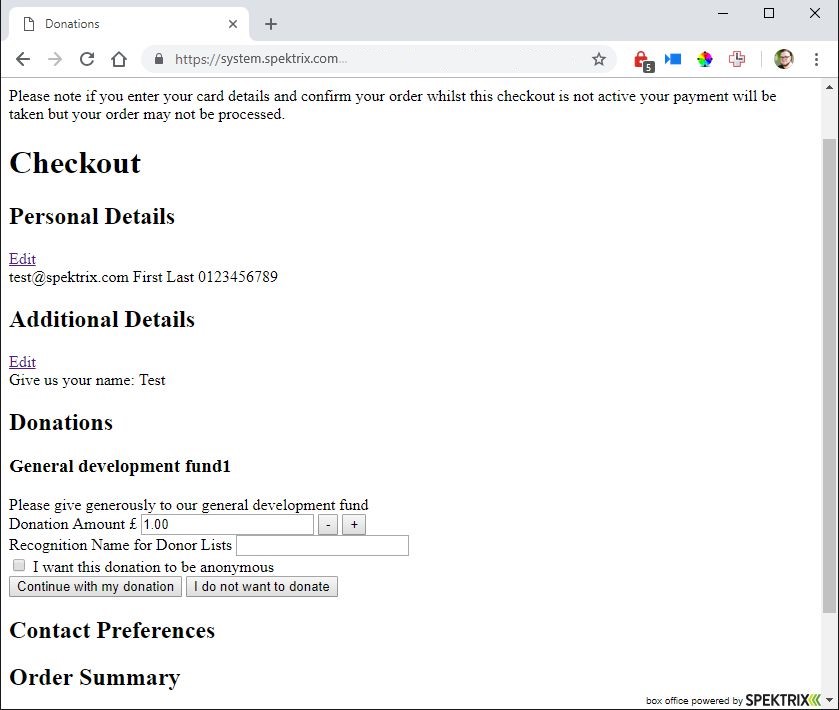
Donations
secure/checkout/v2/donations
This element of the flow will only show if the client offers the option to donate during the checkout. If the user wishes to donate to the client, then they can enter the amount they wish to give or alter the amount using the “-” and “+” buttons.
The user is also able to add a Recognition Name or make a donation anonymously, if the client has enabled this functionality in the checkout.
To move to the next page, the customer must select “Continue with my donation”. If the user does not want to donate, they can select “I do not want to donate”.
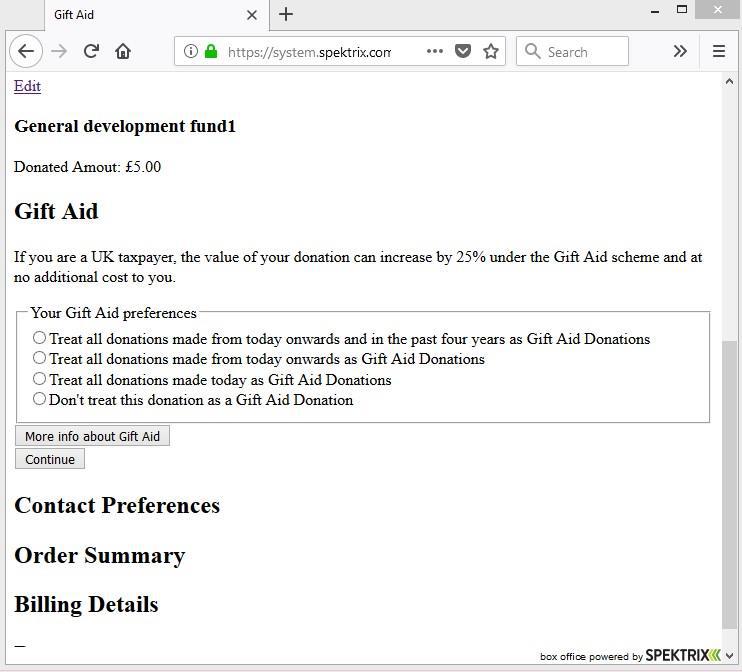
Donations, Gift Aid Declaration
secure/checkout/v2/giftaid
This element of the flow will only show for UK clients who track Gift Aid with Spektrix, when the user has donated.
If the customer doesn’t have a valid Gift Aid declaration, they will be prompted to make a declaration. If the user wants to read information about Gift Aid they can click “More info about Gift Aid”.
To move to the next page of the flow, the user must select an option and click “Continue”.
Contact Preferences
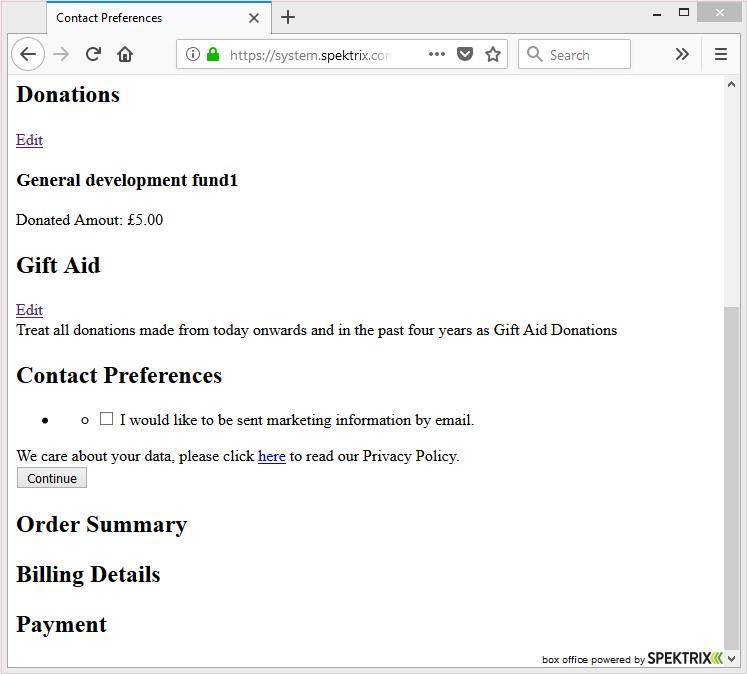
secure/checkout/v2/contactpreferences
This page of the flow will only appear if the client is collecting contact preferences from users and there are relevant contact preferences which the user has not been asked for previously.
The user can indicate their contact preferences by ticking or un-ticking the box relative to a contact preference.
To continue to the next page, the user must click “Continue”.
Order Summary
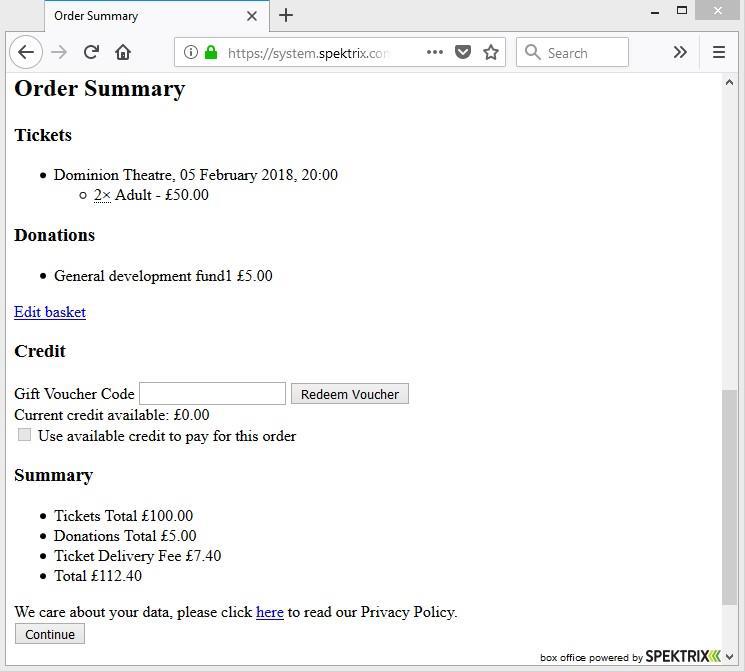
secure/checkout/v2/ordersummary
This page of the flow shows a summary of the order.
If a user has a gift voucher then they are able to redeem this here using the relevant voucher code. If the user has available credit then they are able to indicate if they want to use their account credit to contribute towards the outstanding balance of the order.
The client can choose to display their terms and conditions which, if displayed, the user must agree to in order to progress.
To continue to the next page, the user must click “Continue”.
Billing Details
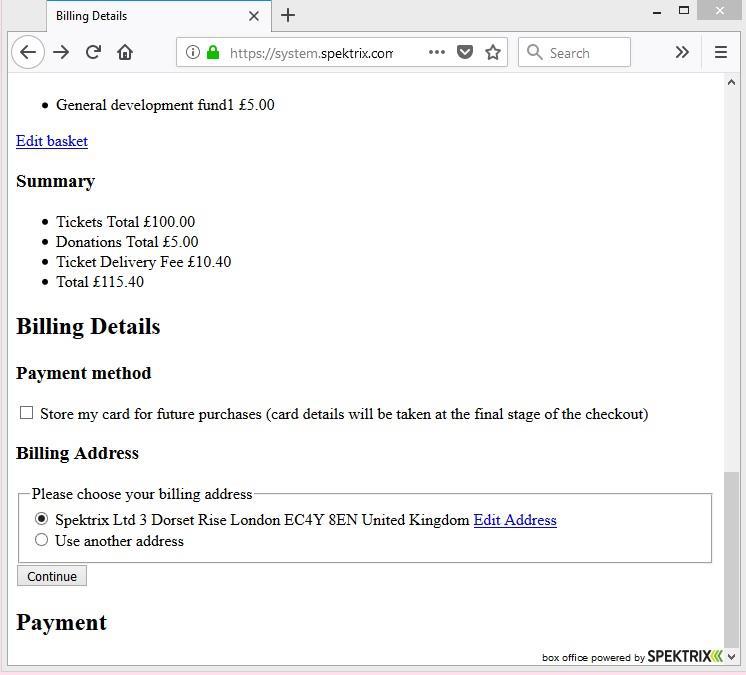
secure/checkout/v2/billingdetails
This page of the flow will only appear if there is outstanding balance on the order.
The user must select or add a Billing Address. If the user previously added a delivery address to the order in “Ticket Delivery”, then they will be able to select that address as their billing address.
If adding a new address the user must enter the required address fields. If 'Postcode Lookup' is available the user must select their Country, and then enter a Postcode. Once a user has entered their Postcode, they can select “Find my address” and select their address from a matching list of addresses. If the user’s address is not in the lookup list, then they can choose to enter their address manually.
If Card Holder Wallets are available, the user can opt to store their card for future purchases. If the user has previously transacted with the client and saved a card to their wallet, then they can select their saved card or opt to add a new card on the next page.
To continue to the next page, the customer must select an address and click “Continue”.
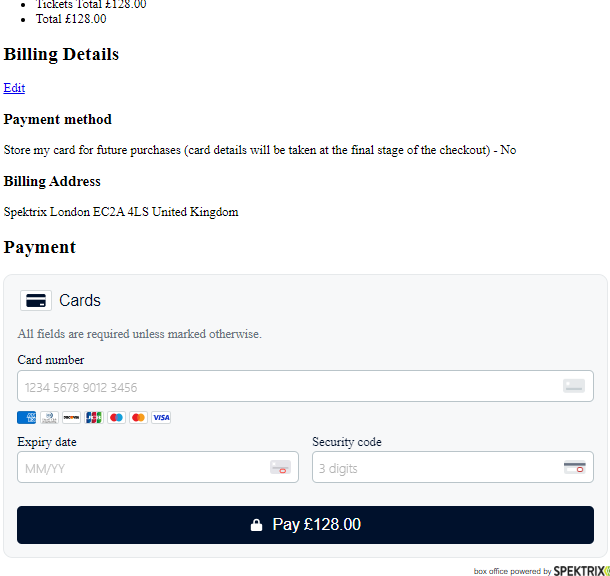
Payment
secure/checkout/v2/payment
This page of the flow will only appear if there is outstanding balance on the order.
If the user is paying with a new card or has never transacted with the client before, then the user must enter their card details.
If the user has previously transacted with the client and opted to use a card saved in their wallet, they will only need to add their security code.
To confirm their payment and move to the next page the user must enter their card details and click “Confirm Payment”.
The section of this page where the customer enters their card details is the Spektrix Payments component. This can be styled using the same stylesheet as the rest of the Iframes. For more information about the payment component, view Spektrix Payments.
Order Confirmation
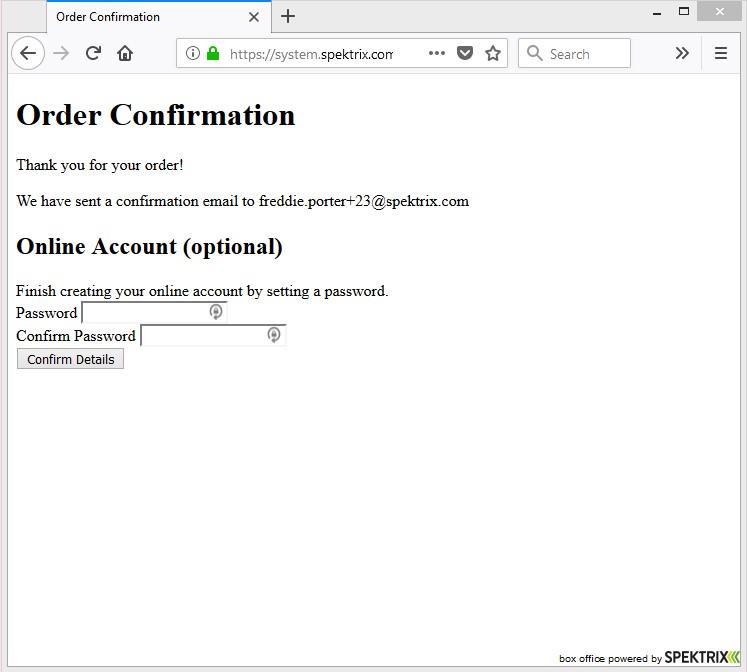
secure/checkout/v2/orderconfirmation
This page shows when an order has been confirmed.
If this is the first order made by a user, then the user will be offered the option of creating an online account by setting a password. If the user does not create a password they will still be able to use this account in the future by using the login link at the start checkout page.
Styling the Express Checkout
It is not possible to add custom messaging in the Express Checkout flow via Settings interface > System Config > Custom Website Messages > Custom message for checkout.aspx or Custom message for confirmation.aspx as these fields only apply on the Classic Checkout.
CSS Architecture
The Express Checkout flow can be styled to match the client’s website styling and provide a seamless branded booking experience for customers. Stylesheets can be uploaded to a client system for reference in the implementation. For further details on how to do so, please see our Website Admin guide.
Please note that the CSS Architecture detailed below is is only applied to the Express Checkout at present. For guidance how to style the remaining parts of the customer interface, please see our styling guide for the classic checkout.
The Express Checkout CSS architecture is based on a principle of specificity, which allows an element to be styled across:
- the entire customer interface;
- the page an element is on; or
- the section within the page an element is on.
All in the lowest possible specificity.
To match this, the architecture is split into three classes:
- Concept
- Flow
- Scene
For ease, this is abbreviated to CFS for the remainder of this document. There are also Helper classes which provide options for further specificity when styling.
The CFS architecture is only applied to the Express Checkout at present. The CFS architecture
Class Namespacing
Every class provided by Spektrix is namespaced with “spx-” to :
- Make it easier to identify in your CSS which classes are targeting Spektrix Iframes.
- Clarify in our markup which classes you should target.
Any classes in the customer interface that are not prefixed by “spx-” are not static classes intentionally added by Spektrix. They are either classes inserted either by libraries used in the Spektrix platform or through additional javascript added via website admin and therefore may change. We recommend only targeting the Spektrix namespaced classes with styling to avoid any potential issues caused by changes outside of Spektrix’s control.
Concept Class
Example: .spx-section-container
Description: The Concept class type describes the element itself and the highest possible level context of what it does.
Concept classes are generic, with the widest possible reach across the entire Express Checkout. A Concept class appears on every element of the same type and on elements that perform the same role.
For example, on pages outside of Express Checkout where a <div> might act the same as a <section>, they could potentially have the same styling class. The majority of base styling and overrides will target Concept classes.
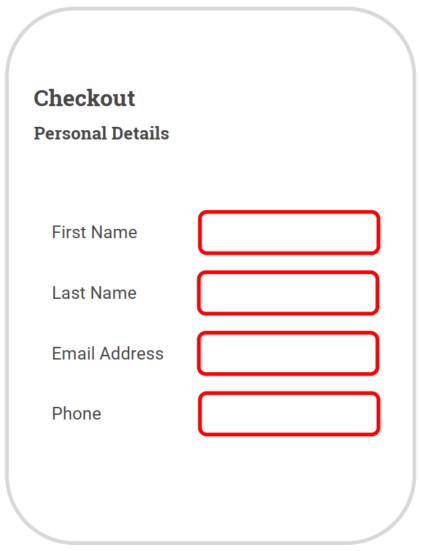
Use Case: Styling a container to have a red border at Concept level means that all containers across the entire customer interface will have red borders.
Flow Class
Example: .spx-section-container__checkout
Description: The Flow class type indicates the position of the element within the customer interface. Flow Classes reference either a flow (a series of Iframes compiled together, such as the Express Checkout) or a single page. Flow Classes are broad classes with wide reach across the flow or page you’re styling.
Use Case: Styling a container to have a red border at Concept level means that all containers across the entire customer interface will have red borders, but styling containers to have a green border at Flow level in the Express Checkout means that all containers in the Express Checkout Flow will instead have green borders.
If an element is on an isolated page that is not part of a flow, such as the Merchandise page, then the Flow Class will refer to the page.
If an element is on a page that is part of a flow, such as the Express Checkout flow, then the Flow Class will refer to the flow.
Scene Class
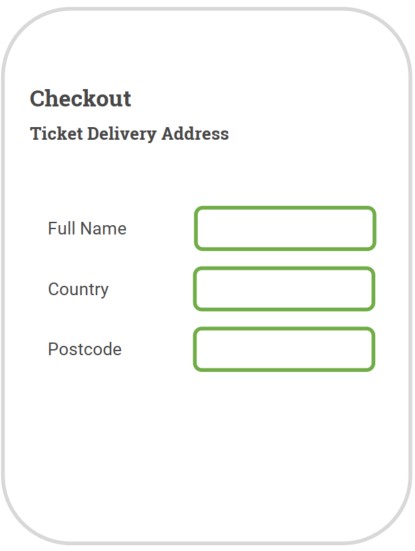
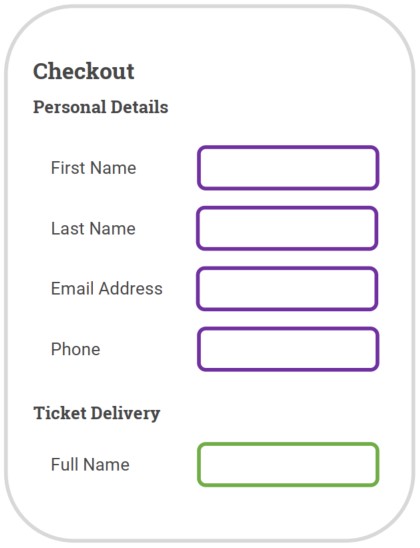
Example: .spx-section-containercheckoutpersonal-details
Description: The Scene class type indicates the section within a page or flow in which the element sits, or the section itself. Scene classes are the most explicit classes with the narrowest reach.
Use Case: Styling a container to have a red border at Concept level means that all containers across the entire customer interface will have red borders. Styling containers to have a green border at Flow level in the Express Checkout means that all containers in the Express Checkout Flow will instead have green borders. Styling containers to have a purple border at Scene level on the Personal Details page within the Express Checkout flow means that containers on this page of the Express Checkout flow will have purple borders.
If an element is a section or sub-section, the last part of the element is named after the content that the section or sub-section contains. This is often defined by the header or legend of that section or sub-section.
Each Scene Class is unique across the customer interface.
If an element defines phrasing, form or heading content, for example a label or h1, the Scene class will be the same as the closest section or sub-section.
Helper Classes
Helper classes are designed to allow extra specificity in styling elements. There are five types of helper class in the Spektrix CSS architecture:
State
Name: .spx-state
Example: .spx-state-required
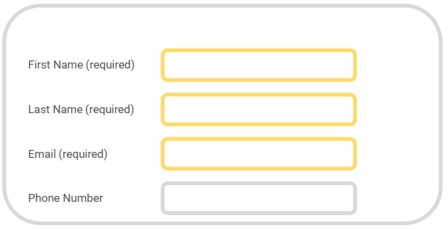
Description: The State helper classes allow an element to be styled based on the state of an area on the page. They can be found on parent containers, individual elements, or both.
Use Case: Apply an amber border to a field that is required.
Intent
Name: .spx-intent
Example: .spx-intent-distinguishable
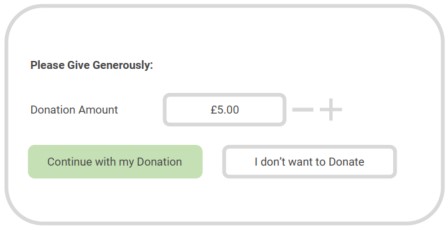
Description: The Intent helper classes allow an element to be styled to stand out from other elements and allow for further customisation of a flow or page.
Use Case: Distinguishing a button from others on the page so as to draw users to a certain option, such as confirming a booking.
Validation
Name: .spx-validation
Example: .spx-status-valid
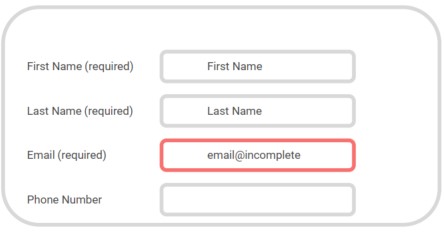
Description: The Validation helper classes allow an element to be styled according to the status of validation on a form, to provide visual cues to users to indicate if data posted in a form is valid.
Use Case: Give a field in a form a red border if it has been posted with invalid data.
Data
Name: .spx-data
Example: .spx-data-postcode
Description: The Data helper classes allow an element to be styled according to the data it holds. A Data helper class will only ever represent a single item. For example, the first line of an address, or a postcode.
Use Case: Visually link all elements based on the data type such as name fields.
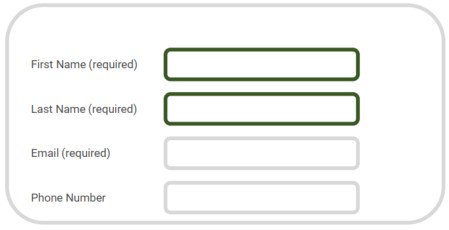
Data-Group
Name: .spx-data-group
Example: .spx-data-group-basket-summary
Description: The Data Group helper classes allow an element to be styled according to the group of data in which that element sits, for example an entire postal address. Data Group helper classes only appear on elements that have multiple children elements.
Use Case: Embolden the basket summary so as to draw attention to it before payment.
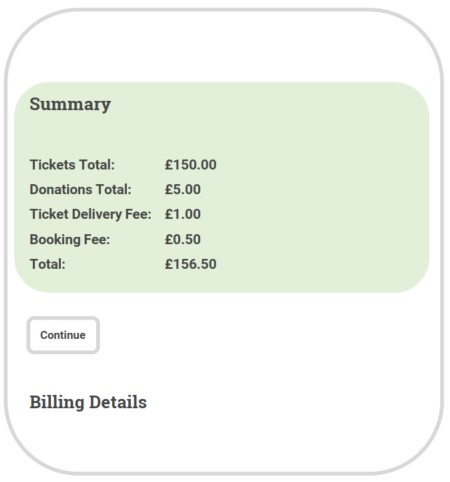
Spektrix Scripts
As with the rest of the Iframes, the Express Checkout uses the Iframe Resizing script to control the height of the Iframe.
Flow Scroll
This script is currently used only for the Express Checkout. The Express Checkout is a flow built from a series of pages in Iframes which are stacked on top of one another to provide a speedy checkout experience for users. As they are separate pages, when users transition from one page to another, then the page is reloaded and the user is scrolled to the top of the parent page. This script is used to scroll users to where they left off so as to provide a seamless experience.
The Flow Scroll script works by calculating the position of the active-element (the section of the page a user is interacting with) on the Iframe and calculating the position of the Iframe on the parent page. The script then uses these two calculations to scroll the parent page to the specific point with which a user is interacting.
The recommended solution to implement the Flow Scroll script is for a web agency to download the Javascript file for this script. Once an agency has downloaded this script they should host the script and then reference this in the HTML of each page on which the Checkout Flow is implemented.
When implementing the Flow Scroll script, there are a few things to be aware of:
-
The Resize script must be implemented in order for the Flow Scroll script to work as they interact with each other.
-
If there is no room to scroll (i.e. if there is no space below the Iframe) on the parent page, the script will not scroll to the content because there is nowhere to scroll to.
-
The Flow Scroll script will not take into account any elements that are outside the normal flow in calculating the position to scroll to. These elements may include any that are positioned fixed, relatively or floated. This can also include headers on the parent page but applies to both the parent page Iframe.